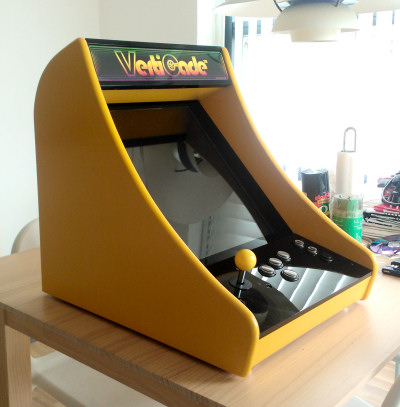
How to build a MAME cabinet - A detailed guide and how to
Home - Step by step - Work Drawings and Artwork - Builders WikiFAQ - Specs - Email - Video - Links
  

Step by step
The making of the econ
Project MAME - Weecade  - VertiCade  - TaitoRama -  Nanocade ArcadeStik - econ
__________________________________________________

Page 7 / 8
Construction & Electronics

 20/04/2012
 

Monitor prepared for paint The monitor I use for this project is silver coloured. I have to cover the silver up with some black paint to hide the frame.
Monitor paint job This sure does make a mess.

The result is fine and now it's ready to be installed.
The cabinet is neatly arranged adn there is plenty room because of the mini-itx size and the PicoPSU. This is recommended when making bartops.
This is from the other side. Notice how the vent holes align perfectly with the cooler on the motherboard.
Frame for marquee The black frame for the marquee is mounted. The screws is painted too and they are nicely recessed.
Time to make the cover acrylics for the monitor. I start with mounting the cover, then mark where the monitor is with a pen. I use these marks to decide where to cut the foil.
I have removed the foil from the edges, because this is where I need to pain to hide the monitor. Remember that it is the side that face towards the monitor you wan't to paint to get that perfect shiny black look.
After painting the cover with black spray paint, I remove the foil in the middle and the result is perfect.
After the paint has dried, I can install the cover. Now the cabinet is almost done.

Turn to the next page for detailed photos of the finished cabinet!
  Join our Facebook group and receive updates and discuss MAME cabinets with fellow retro gamers:
Page 7 / 8  -  Construction & Electronics


If you decide to make your own MAME cabinet using my drawings, please feel free to make a donation,  as I'm trying to raise enough money to make a new up-right cabinet, that's hard to do as a student.


[ Copyright koenigs 2012 ]