Page 1 / 8
Design &
Construction |
  |
|
06/04/2012
Most of the arcade games I play, are vertical
games. Mr. Do!, Donkey Kong and Galaga are are some of my
favourite games. They are all with vertical screen orientation
and they all need only on set of controls with just one button. So naturally I wan't
to make a cabinet just perfect for this type of old school
arcade games.
I would like to thank ArcadeShop.de for sponsoring some of the parts for this
project. I can definitely recommend Arcadeshop.de for their great
support and great products. Now go buy some pushbuttons and
joysticks, you will not find a better place to do so:
--->
 <---
<---
|
|

 |
My goal was to make a compact cabinet with a
vertical mounted 17" LCD monitor. This way you could also use
the design for a regular mounted 19" monitor by making the
cabinet a few inches wider. This way more people will hopefully
benefit from the design files I will make available soon :)
The cabinet basically started out like the
sketch on the left
and ended up looking like the one to the right. I made about 15
sketches in between ending up with the result on the right due
to size limitations and restrictions internally.
I don't think I could have made a more compact
design to fit a vertical 17" or a horizontal 19". Most of my
design are based around the idea of making the most compact
cabinet possible. Less is more - in my opinion.
|
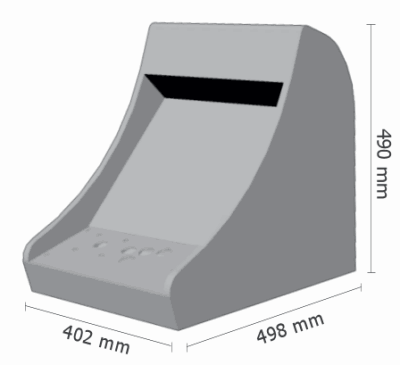 |
Here is a simple 3D model of the cabinet. I think it is a little
bit more modern, sleek and streamlined than the WeeCade design.
I can only hope it will be as popular.
IMO this design has some advantages because of the low height of
the control panel. I always found that the WeeCade was too high
to use comfortably at a normal table. |
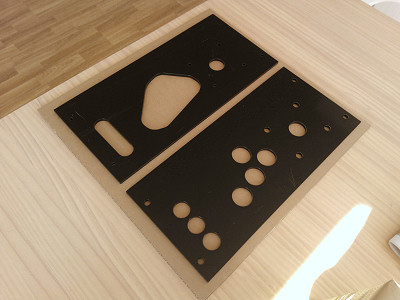 |
The control panels is made of two layers of 5 mm
acrylics, but you could also use 12 mm MDF.
My design only has four pushbuttons, but the is easily room for
six buttons there. But I don't think there is any need of more
than four buttons for me.
Opposed to my other control panels, this has holes for bolts. I
don't have access to making the special brackets and metal
control panels I have used earlier on, but with four button head
Allen bolts, this should look fantastic too. The top layer has
larger holes for the bolt heads, so they are recessed in the
layer and will be flush with the surface.
I will make the control panel available for purchase through my
acrylic dealer later. I will make a version with six push
buttons too. |
 |
The two layers of acrylics are merged with
a special solution for acrylics. Basically they become one
piece after just a few minutes.
I use tomato cans for this job, but you could also use pies,
pineapple, spam, beans or even beer cans...
The solution I'm using here is Evonik Acrifix 116. In the US
there are similar products from Weld-on and TENSOL in the UK.
|
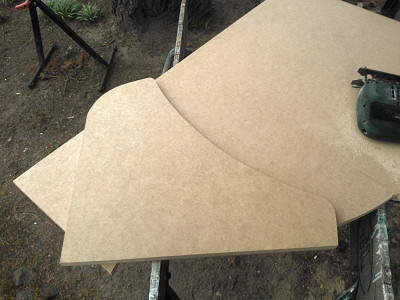 |
Time to cut out the side panels from the 16 mm MDF board with a
jigsaw. You definitely become better at this by practising and
the key is to go slow and steady. Don't push forward, have
patience. |
 |
After cutting out both sides, they were
processed with a milling machine to make the edges rounded. You
could also use T-moulding for a much stronger edges. I don't
have the tools to do T-moulding at the moment.
|
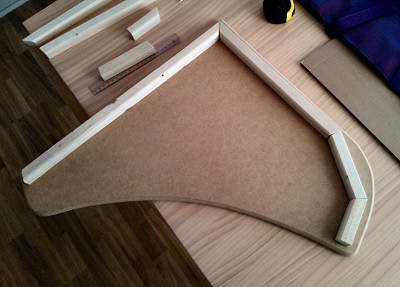 |
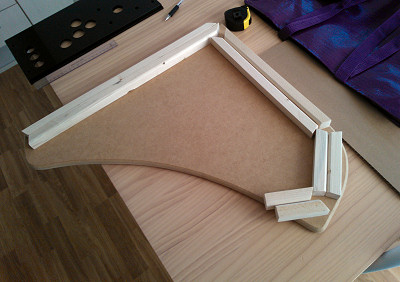
Now it's time to make the mouldings. I have made the mouldings
myself by cutting up some spare planks. I made them 22 mm by 22
mm. If you have a circular saw, this is a much cheaper way to do
it, and it can literally be done in minutes. |
 |
When making the mouldings, a very easy way of saving some time
and getting the best possible end result, is to make both sides
simultaneously. This way you can make them look exactly the
same. |
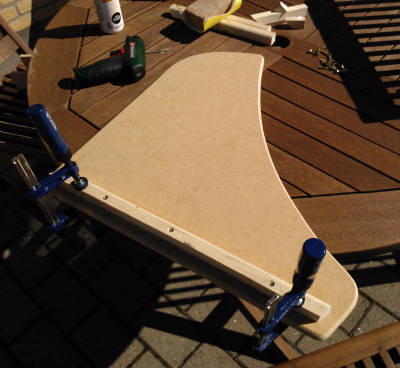 |
Time for fastening the mouldings. You only need to use a few
screws, the glue should do the rest. Place the screws so that
you make room for the other screws when mounting the panels. |
 |
Once again I try to do both sides simultaneously to ensure a
perfect mirrored result. |
|
|
 Join
our Facebook group and receive updates and discuss MAME cabinets
with fellow retro gamers: Join
our Facebook group and receive updates and discuss MAME cabinets
with fellow retro gamers: |
|
Page 1 / 8 - Design &
Construction |
  |
|
|
|
If you decide to make your own MAME cabinet using my drawings, please feel free to
make a donation, as I'm trying to raise enough money to make a new
up-right cabinet, that's hard to do as a student. |
|

