Page 1 / 4
Design &
Woodworking |
  |
|
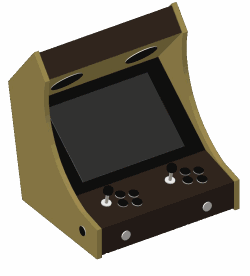 |
Feeling much more confident after making my first MAME cabinet,
I decided to do a much more precise 2d model in Autocad. The 3D
model is just a simple model.
This should make a much faster and easier cabinet to build than
Project Mame.
I decided to go with a bartop design. The whole idea is to
make it as small as possibly for a 17" LCD and two player setup
with decent sound system. |
|
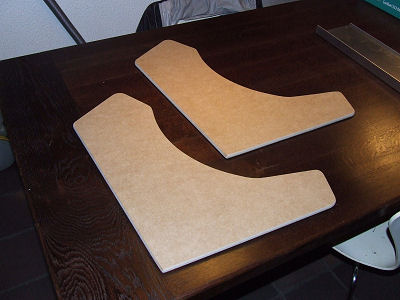 |
The sides
were easily cut out in 12mm MDF board. I used 16mm for Project
Mame, but WeeCade is a much smaller bartop and 12mm is more than
enough. |
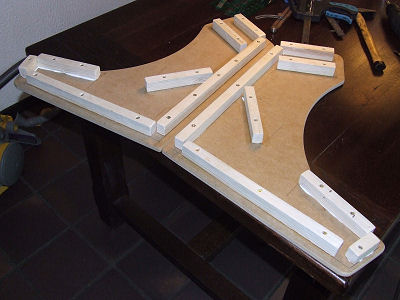 |
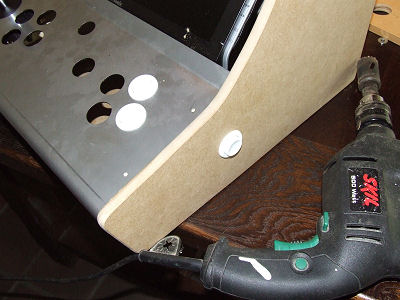
The
mouldings is mounted with glue and screws. Use plenty glue, it
will make it much stronger and less likely to dry out later. |
 |
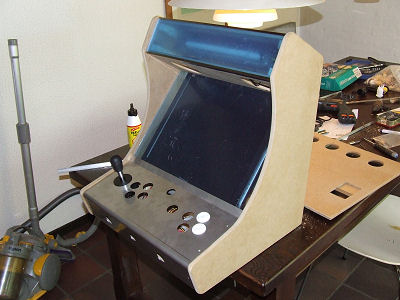
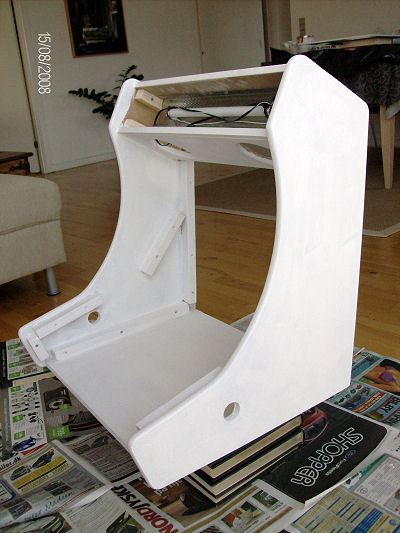
The buttom is mounted and the backpanel is tested on with the
PSU. There aren't much room for mistakes in this cabinet, not
much at all actually. This also makes it a fun cabinet to build. |
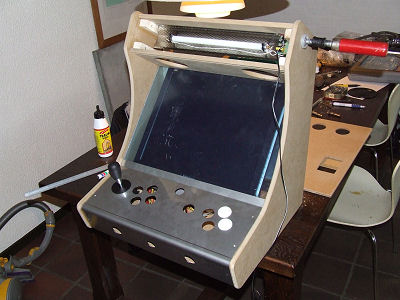 |
The speaker-board and top of the cabinet is placed. I also tried
to fit the control panel.
The control panel is made from 1.5 mm
stainless steel.
I also tested if the light would fit.
|
|
|
 |
Finally the bezel and marquee is made and they fit perfectly.
The marquee is mounted with steel frames. |
 |
29mm hole for pinball/coin input it made. |
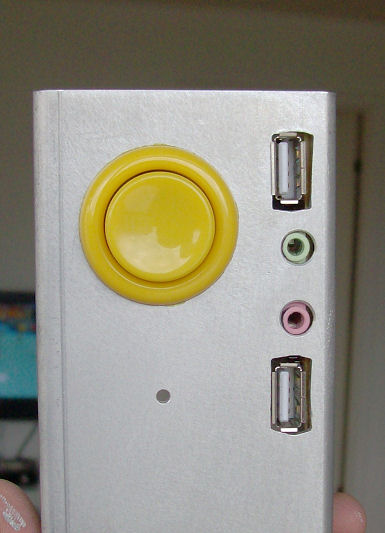 |
I made this panel to be mounted on the backpanel.
2 x USB
1 x headphone
1 x mic
1 x Powerbutton
1 x Volumecontrol (not installed yet) |
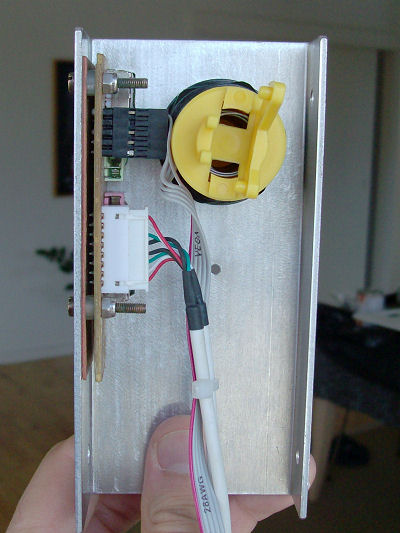 |
Here is the back. I got the PCB from a midi-tower cabinet. |
 |
Time to paint the WeeCade. First
two layers of primer. This is important, always use primer
first.
|
|
|
 Join
our Facebook group and receive updates and discuss MAME cabinets
with fellow retro gamers: Join
our Facebook group and receive updates and discuss MAME cabinets
with fellow retro gamers: |
|
Page 1 / 4 - Design &
Woodworking |
|
|
|
|
If you decide to make your own MAME cabinet using my drawings, please feel free to
make a donation, as I'm trying to raise enough money to make a new
up-right cabinet, that's hard to do as a student. |
|
