Page 1 / 4
Design &
Woodworking |
  |
 |
In January 2008 my geeky, yet awesome
brother told me he was working on what was to become his first
arcade cabinet: Project Mame. He showed me his plans and offered
to work out the blueprint and advice on building my very own
machine. Being a total arcade freak I was hooked from the start,
but I was a bit reluctant since I had no experience in building
such a machine. Luckily my brother convinced me and even though
it took a lot of work and sawdust in my appartment I have never
once regretted my decision.
I got over my my initial
fear of doing my own project and since I always have been a fan
of the old classic and a bit beefy Taito cabinet from the early
80's, I decided that my cabinet should have the same outline,
but have a smaller footprint due to the LCD monitor.
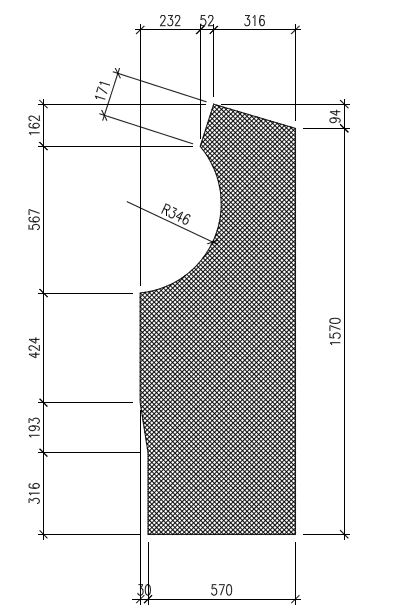
My brother worked out the design and blueprints
according to a Taito Jungle Hunt cabinet I liked and with
the blueprint I was ready to build my very own arcade cabinet.
The TaitoRama.
|
 |
I bought the following items at my local
retailer:
-1x 16mm MDF/HDF board
-1x 12mm MDF/HDF board
-3mm plexiglass 700x1000mm
-1 sabresaw
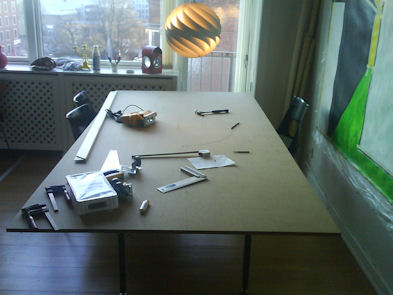
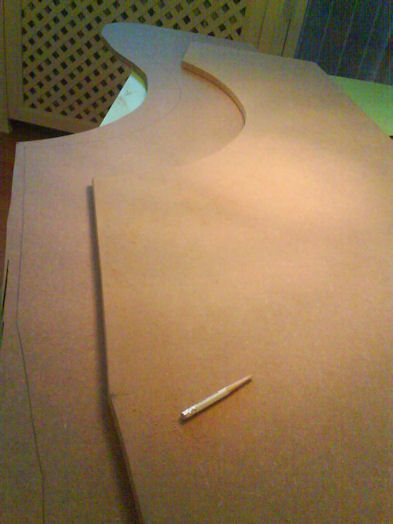
Since I don't
have a workshop to build the machine I placed the 16mm MDF board
on my dinner table in my appartment and started transferring one
of the cabinet sides onto the board with a pencil. |
 |
For the rounded part of the cabinet I used a
nail as the center and a pencil attached to a string to draw a
half circle.
The sabresaw eagerly awaits! |
|
|
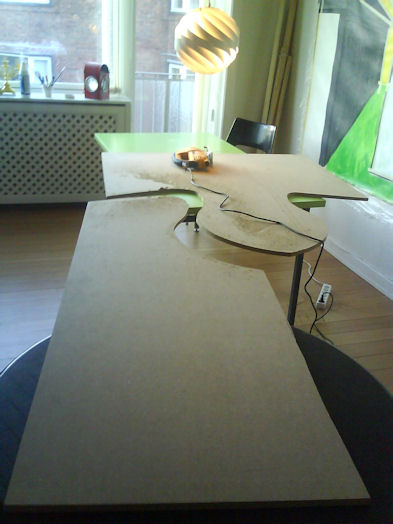 |
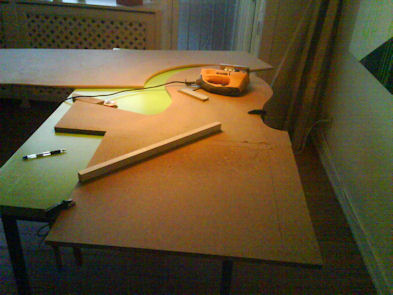
After I had transferred the outline of the
blueprint I roughly sawed out the two arcade sides so I could
handle them better. I used my coffee table to support the MDF
board while I was sawing.
The next step is the fine
cutting according to the outline on the boards |
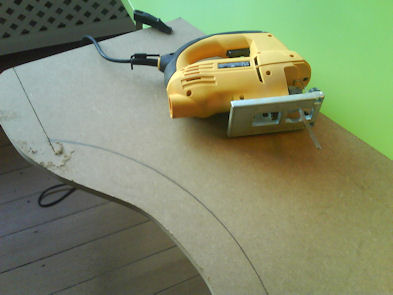 |
The fine cutting of the first of two sides of the cabinet in 16
mm MDF/HDF board.
Do I have to mention that my dinner
table needed to be repainted after the build;o) |
 |
Since the two cabinet sides are identical I transferred the
outline of the finished cabinet side to the MDF/HDF board, so
the two sides would be absolutely identical. Then I cut the
second board with the sabre saw.
After that I sanded the two sides of the board and rounded the
edges facing outwards. You could use a
milling machine if you got one, but I used sandpaper and elbow
grease.
|
 |
Finally I drew and cut out the bottom of the
cabinet in the 16mm MDF/HDF board. It's basically just a big
square.
|
|
|
 Join
our Facebook group and receive updates and discuss MAME cabinets
with fellow retro gamers: Join
our Facebook group and receive updates and discuss MAME cabinets
with fellow retro gamers: |
|
Page 1 / 4 - Design &
Woodwork |
|
|
|
|
If you decide to make your own MAME cabinet using my drawings, please feel free to
make a donation, as I'm trying to raise enough money to make a new
up-right cabinet, that's hard to do as a student. |
|
